oscar party 2015

IMG_7102

 We.  Love. The. Oscars.  You know this.  Planning on throwing an Oscar bash?  We highly recommend that you do (they’re the best).  Here are a few of our favorite ideas for this year.

IMG_7329

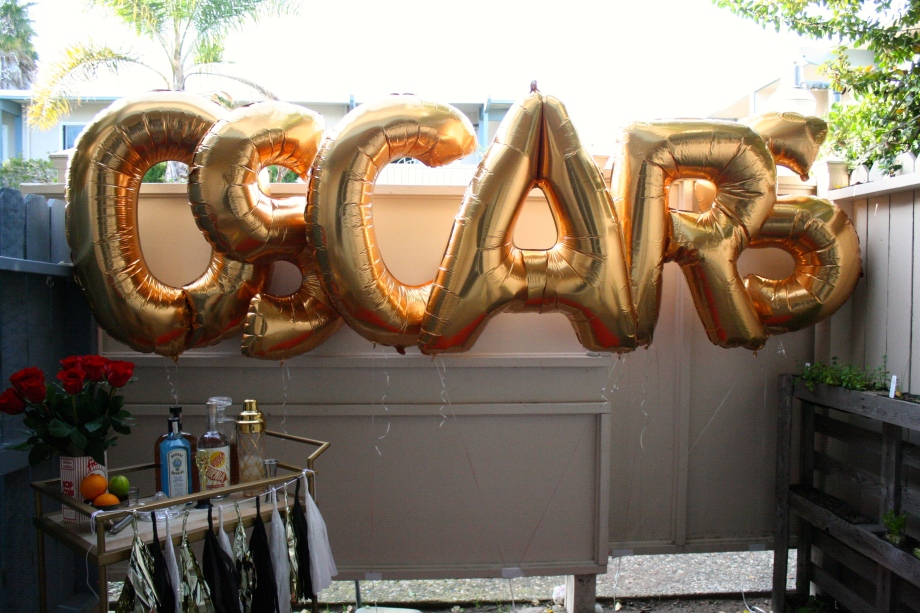
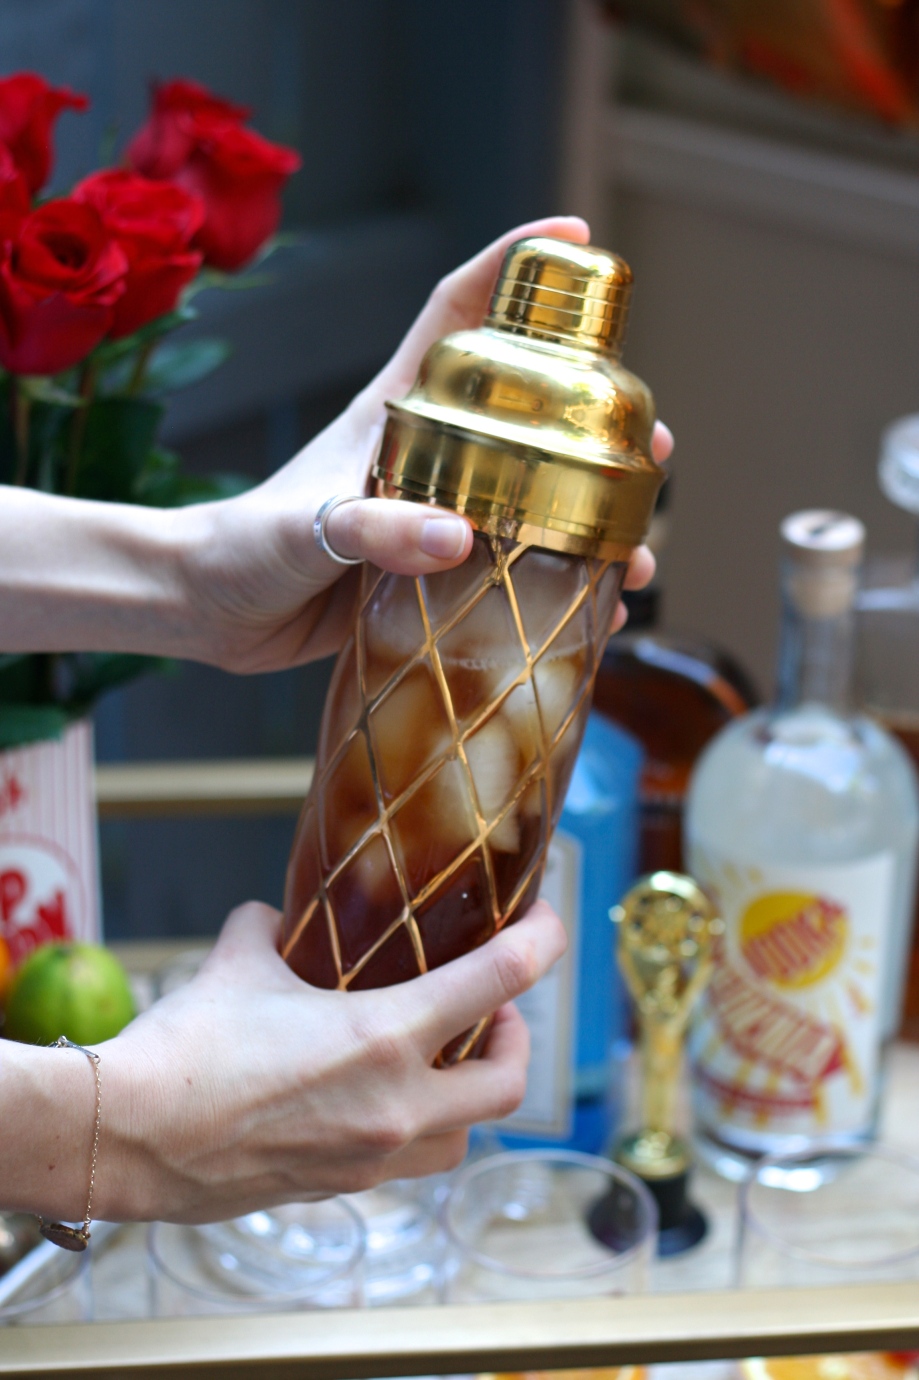
Every Oscar party needs giant balloons, right? We ordered ours online, filled them up at the store, and stuffed them into our tiny car.  Learn from our mistakes and bring a van. This year, instead of champagne, we set up a bar cart so guests could make their drink of choice.

IMG_7048

IMG_7046

IMG_7055

IMG_7125

IMG_7174

IMG_7260Aren’t these balloons just everything?

IMG_7345

A red carpet is a must! We stuck ours under the bar cart for fun #shoestagrams.IMG_7221

Inside we set up a simple buffet.  Popcorn, movie candy, little appetizers, et voilá. Recognize those film strips?  We made them a few years ago for our first Oscar party and love them still.  The piñatas are a score from Party City.

IMG_7202

IMG_7198

IMG_7223

IMG_7310

IMG_7265

Don’t mind us, we couldn’t resist a balloon photo op in the street.

IMG_8303

IMG_8304

For a simple photobooth we hung our star garland, also from our first Oscar partyon the wall.  Other easy options could include gold foil curtains, large gold stars, or red butcher paper.  To give them the “photobooth look” we used the Party Party App by A Beautiful Mess.

output_9ZikvX


xoxo, Keya and Erica

no-weave wall hanging

3 (2)

Okay, first I’ll admit that I started this project the weave-way.  That is, I made my own loom out of a carefully-carved cardboard box (genius!), wrapped some twine around my box creating, what looked to me, like evenly spaced strings….or whatever you call them.  I proceeded to weave my yarn in and out, creating cool tassels and textures, just like all those pictures you see on Pinterest.  With each passing day, my cardboard box started to soften and cave in, and i would pull the strings tighter, which in-turn caused the cardboard to cave more.  Sometimes when a project is not going right, you have to just set it aside for a while and ask yourself, “do I go on or do I start over?”  In this case, I needed to re-strategize and start over.  Turns out, it was one of the best decisions of my life – with inspiration from Kipi, I was able to get the same effect I was looking for WITHOUT spending money on a loom.

ingredients:

a piece of plastic canvas (found in the needle-work section of most craft stores)

a piece of driftwood (found on most beaches) 

twine (thin enough to string through your canvas)

an assortment of yarn (I chose 5 different types including some mop-ends)

sharp scissors (I bought a brand new pair)

IMG_8728

1. The first thing you want to do is figure out your pattern.  There is a ton of inspiration out there to get you started.  Once you have a general idea, you can begin!

IMG_8735

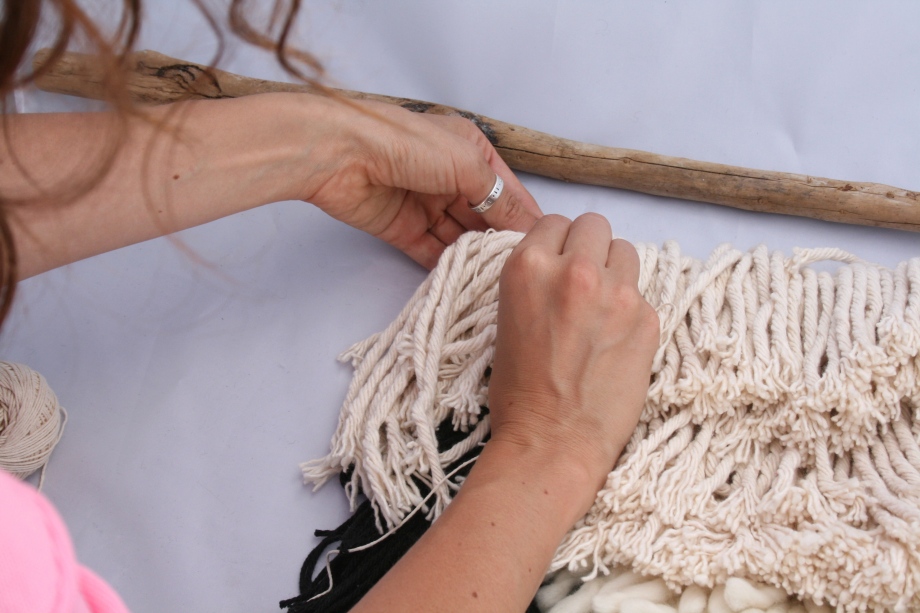
2. This project is all about “tassels”.  So begin by deciding the length of your first row of yarn and start cutting strips that are twice that length (they will be folded in half).  I suggest giving yourself extra room for trimming as well.  Once you have cut a few strands, you can use your twine to tie the strands together in the center and create a tassel.  For thicker yarn I used about 5 strands per tassel (folded to make 10), and the thinner yarn I used about 10 strands per tassel (folded to make 20).

IMG_8749

3. Once you have your tassels, you can begin stringing them through the canvas (equal distances apart – about 5 boxes), and tying the twine at the back of the canvas in tight knots.

IMG_8762

4. Because there is no weaving involved, this project is all about layers and textures.  I highly suggest creating lots of layers.  Instead of doing one row at the top with  Yarn “A”, create a short row and then a longer row underneath before you move on to Yarn “B”.

IMG_8767

IMG_8790

5. Also keep in mind, you never want your canvas to show through so make sure you build your second layer underneath the first, the third layer underneath the second, …etc.

IMG_8821

IMG_8826

6. As you create rows, you can begin trimming the ends of the yarn into straight lines using very sharp scissors.  Trim off small amounts each time until it is at the desired length.  This step is kind of like plucking your eyebrows, don’t go too crazy because these strands won’t grow back!

IMG_8835

7. Once you have all of your tassels tied, you can snip off the excess twine at the back of your canvas.

IMG_8836

8. To attach the driftwood, use a long strand of twine and string through the canvas and around the driftwood, tying a tight knot at the back of the canvas.
IMG_8837

IMG_8839
IMG_8847

9. From here, you can begin stringing the twine through the canvas and around the driftwood at equal spaces apart.

IMG_8872

10. When you reach the end of your canvas, make sure to tighten each loop so the canvas is taught against the stick before tying your final knot at the back of the canvas.

IMG_8884

And voila! No weaving required!

IMG_8917


2


happy crafting!

xoxo, keya and erica


lime infused vodka

IMG_6084

Can we just take a moment to sing the praises of one of my favorite cocktails, the moscow mule?  Light, refreshing, citrusy, and a wonderful ginger kick? Man, I could go for one of those right now.  But, alas, I am writing this post at 11 am so…I’ll refrain.  I’ll admit that one of the favorite parts of the mule is that I can’t taste the vodka- that’s the sign of a good cocktail right there folks.  And how to better disguise the flavor?  Infused vodkas.  Oh yes.

My love for moscow mules aside, you can use any citrus that you like and add it to your favorite cocktail.  Lemon infused for lemon drops?  It’s super easy and simply requires a little bit of time to infuse.  So make ahead of time and store in your fridge so you’re ready whenever 5 o’clock happens to roll around.

Ingredients:

vodka

1 lime (peels)

a clean jar

IMG_6091

How to:

Pour your vodka into your clean jar.  You can make as much as you want.  If you’re planning on infusing your vodka for a party and want to use the whole bottle, then feel free to go ahead and use that bottle.  Add lime peels.  I used about 1 limes worth for mine.  Exact amounts aren’t imperative, and just be sure to adjust accordingly depending on how much you make.  Store in the fridge for about two weeks.  After infusing, strain your vodka to remove lime peels, and store in the fridge until you’re ready to use it!

Enjoy!

IMG_6093


xoxo, Keya


rosemary grapefruit spritzer + rosemary simple syrup

IMG_6015

IMG_5972

One of the things that I love about cocktails is how limitless the options are.  Once you’ve accumulated a sufficient collection of hard liquor and mixer options, you can pretty much make anything.  Sometimes I have an idea for one cocktail, and end up being inspired to try three other options.  Usually when I’m trying different things I make baby versions of the cocktails so I don’t have as much waste and well…sometimes you have to sample a few batches…

A great, and inexpensive way, to mix up your homemade cocktails is to make your own flavored simple syrups.  This is something you’ve seen a few times around here (1, 2) because we’re big fans of it.  All you need is sugar, water, and your flavor of choice.  I’m currently really loving making herb-infused syrups, so get excited to see more herby cocktails in the near future!  This one is sweet and a little tart and oh-so refreshing!

Rosemary Grapefruit Spritzer:

1 oz. vodka

3 oz. grapefruit juice

1/2 oz. rosemary simple syrup (recipe below)

sparkling water

Mix vodka, grapefruit juice, and rosemary in a cocktail shaker with ice and shake thoroughly.  Pour into martini glass and top with sparkling water.  Garnish with a sprig of rosemary and a slice of grapefruit.

IMG_5995

Rosemary Simple Syrup:

1/2 c. sugar

1/2 c. water

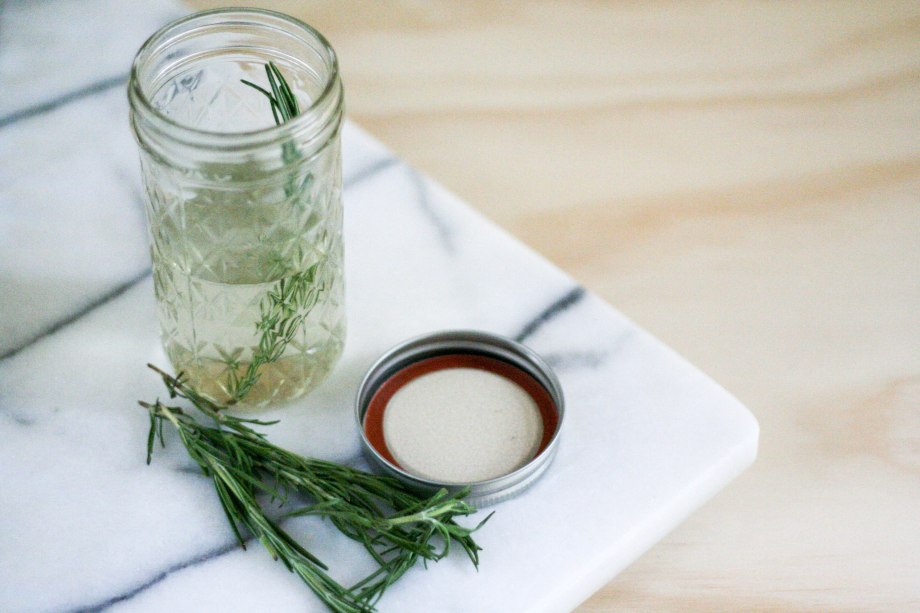
3 sprigs of washed rosemary

Combine all ingredients in a pot and simmer for about 20 minutes, or until the sugar as dissolved and you feel the rosemary is sufficiently infused.  Let cool.  Strain rosemary from simple syrup, and store in the fridge.

IMG_5974

xoxo,

Keya

watercolor pineapple print

IMG_5048

This little print is so cute and easy to make, and will make the perfect summery addition to my kitchen walls.  I’m thinking of making a few more of different kinds of fruits and veggies to hang with it.  As long as you’ve got watercolors and paper, the total cost of this project is the frame, which makes it a really affordable way to decorate!

tools:

pineapple stencil  (this is the link for the stencil that I used)

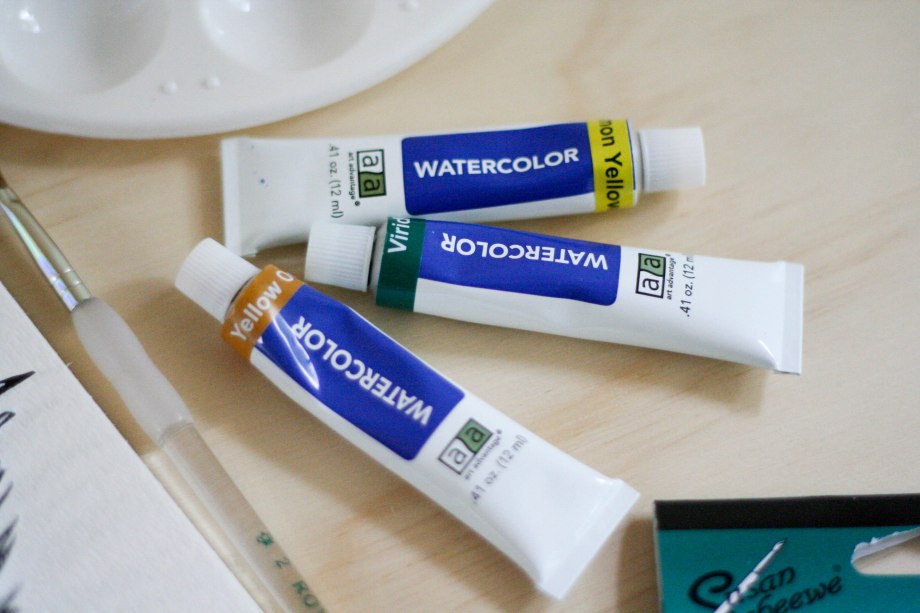
watercolors + paintbrushes

watercolor paper

wax resistant sticks / pencil

frame

spray adhesive

white card stock / thick paper (measured to size of frame)

how to:

     First you’ll want to select and print out your stencil of choice.  I wanted mine to have lot of detail for the pineapple leaves, but I think that a simpler stencil would be really cute as well.

IMG_5925

     Once you’ve cut out your stencil, place it in the center of your watercolor paper and make a thick outline with the wax resistant sticks.  I tried this project a couple of ways, just outlining the stencil in pencil and with the wax.  I personally like using the wax because it holds the paint inside of the stencil marks and creates a darker outline around the design where the paint is trapped. Also, make a thin line between the fruit of the pineapple and the leaves to prevent color bleeding.

Untitled Export

     Mix your watercolors to your desired color.  I wanted my yellow and green to be bright.  I mixed a few variations of each, but ended up mostly using the pure yellow.  I used more variations of the green to create the effect of multiple leaves.

IMG_5926

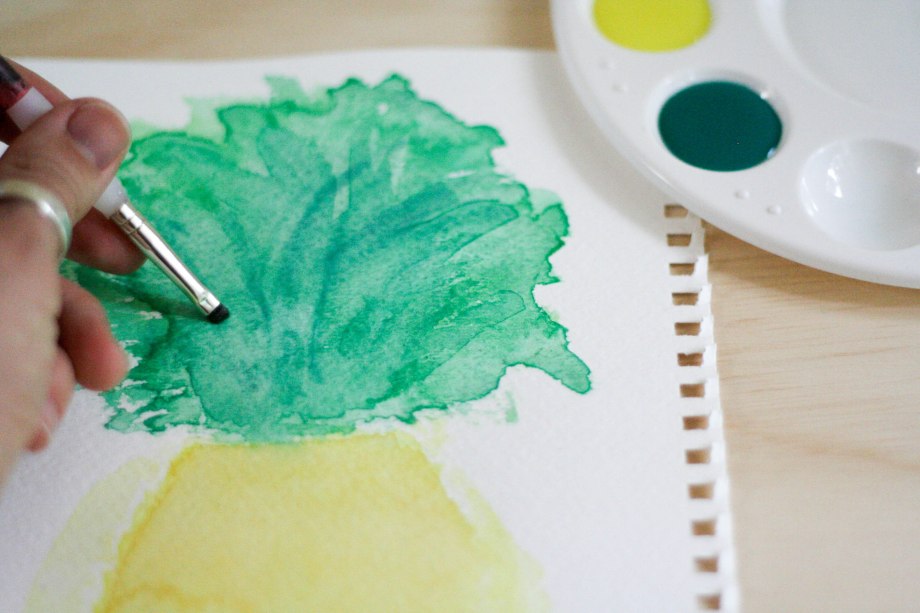
     So the picture below was kind of my trial and error run, and I’ve got some tips to share from it!  I found that the final project turns out a lot better if your paint in layers.  First by finishing the yellow portion before painting the leaves; this will help prevent the two colors from bleeding into each other, as you’ll see in the picture below.  (If this happens, then quickly dab at the paint with a paper towel to remove it, and paint over the problem section.)

IMG_5957

     Another tip is that the thicker the wax outline the better.  I thought that I would be able to freely run my paint strokes over the edges of the outline and that it would remain, but that didn’t really work out.  So the next time around I did the thicker outline and I was much more conscious about getting too much water on the wax and was much happier with the results.

     Paint a light coat of paint first and let it dry.  Then paint a second or third coat depending on your desired color. Have fun making the paint thicker in some areas and lifting your paper to let the paint run and blur.  This creates the pretty watercolor effect.  For the leaves I brushed arching stroked from bottom to top with varying colors, letting them dry in between.

     Once your painting is dry, it is time to cut it out.  If your outline isn’t exact enough, place the stencil over the top, and outline once more in pencil.

IMG_6043

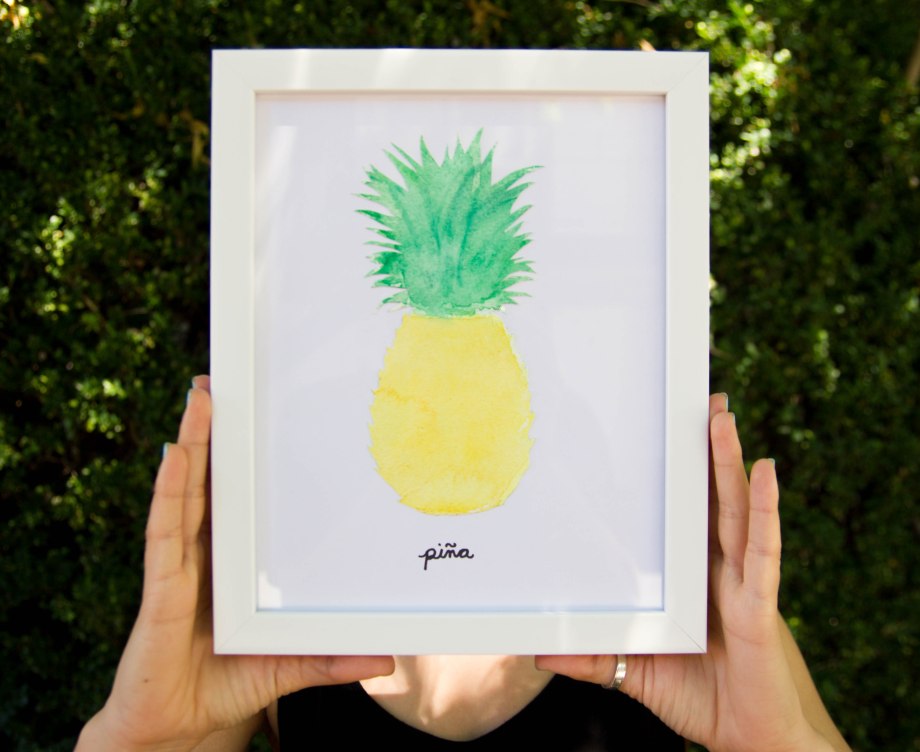
     Spray the back of the pineapple with spray adhesive and gently lift and place onto your card stock in the center.  Let dry and place in your frame!  I wrote “piña” on mine, and to make it fit, I placed my pineapple slightly above center- this part is up to you!  There are so many ways to interpret this craft depending on what you want to make!  I’m thinking tomatoes and watermelons next… Clearly summer is on my mind!

IMG_6056

xoxo, Keya

stars and stripes mixed berry pie

IMG_1820

My experience with inspiration goes like this: it strikes when it strikes and generally it does not strike at the most practical time.  Which is how I found myself, at one this afternoon, heading off to the store for ingredients to make this pie while I should have been busy barbecuing.  Another thing I’ve learned about inspiration is that if you don’t act on your thought in the moment, it tends to fade away and that first glorious sense of realization tends to seem far less brilliant as it did when the idea first struck.  So here I am blogging about a 4th of July pie that it’s too late for any of you to make! There’s always next year, right?  Besides Americana is in right now, and you can be patriotic any day.  Also, I really just couldn’t resist!

IMG_1706

For the recipe, I went off of Cafe Hon’s recipe!  So you can check it out here for more detailed instructions.

Stars and Stripes Mixed Berry Pie

Dough: I bought it!  Hey, this was all very last minute!

Filling:

2 cups fresh or frozen blueberries

2 cups fresh or frozen rasberries

1 cup fresh or frozen blackberries

1/2 cup flour

1 cup sugar

1 1/2 teaspoon cinnamon

1 1/2 tablespoon butter

2 tablespoon cornstarch

Directions:

1) Preheat oven to 350 degrees.

2) Roll out the bottom crust of dough and place in pie dish.

3) Mix all the filling ingredients together and fill the pie.  (If you are using frozen berries, make sure to defrost and drain first).

4) Roll out the top pie crust on a piece on parchment paper.

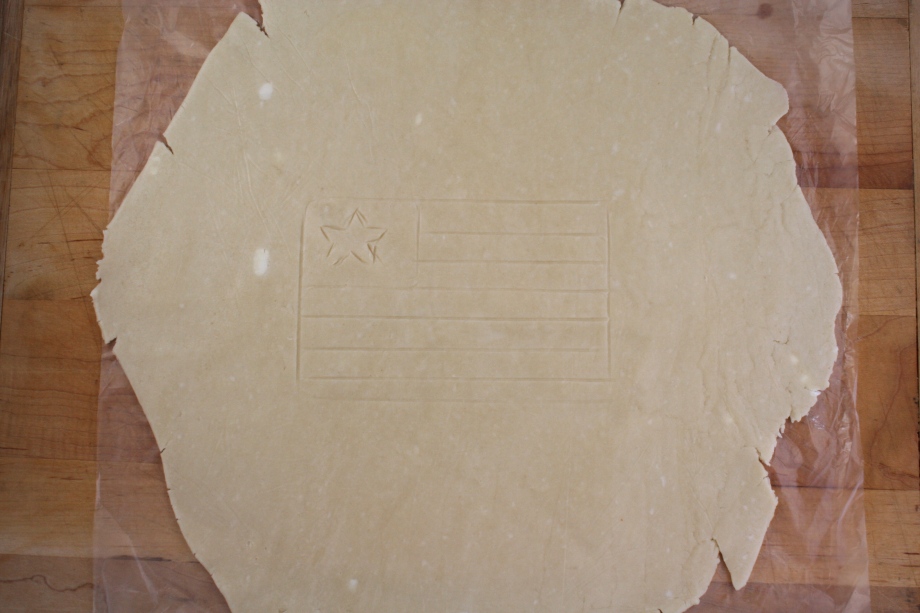
5) To begin making the flag, first lightly trace the image by making slight indentations in the crust.  Once you are satisfied with the design then cut out the strips of the flag and star gently.  Once you’re done, it’s ready to be placed on the pie!  I found that it was easier to move if I placed a second piece of parchment over the top.  This way, I could lift the crust up easily and remove the bottom piece of parchment without spreading the design.  Seal the endges, cut off extra pie crust, and use your thumbs to make ridges along the edge.

IMG_1712

IMG_1713

6) Brush cream and sprinkle sugar over the top of the pie.

IMG_1716

7) Bake at 350 for 45 minutes or until the top is golden brown.

8) Enjoy!

IMG_1810

xoxo,

Keya

homemade soy candles

IMG_5487

Lately I’ve been obsessed with burning candles all. the. time.  In the past I would purchase a candle here and there and leave it out as display, but almost always forget to light it.  So my candles would pretty much last forever.  No longer!  So it seemed necessary to start making my own since I can make about five big candles for the price of one nice one.  I chose soy wax because it is sustainable and slow burning.

IMG_4442

Upon researching candle making, I found quite a few rather technical videos about how to make the perfect candle.  Apparently candle making is a big thing?  Anyway, while I wanted my candles to turn out well, I also wasn’t interested in buying a gazillion different tools.  So here is my rather bared down candle making how to, using things that I had around the house.  I wouldn’t recommend using any precious kitchen tools in case the wax is hard to remove.  Notwithstanding, I was able to remove all of the wax from the bowls and spoons I used.  I washed everything before the wax had a chance to dry completely and poured boiling water over the difficult areas.

tools:

double boiler

candle container

soy wax (1 lb. ~ 18 oz melted)

wicks

wick tabs

hot glue

popsicle sticks/straws

essential oils (optional)

oil-based color chips/crayons (optional)

1.) Cover your work area with wax paper to protect the surface.  

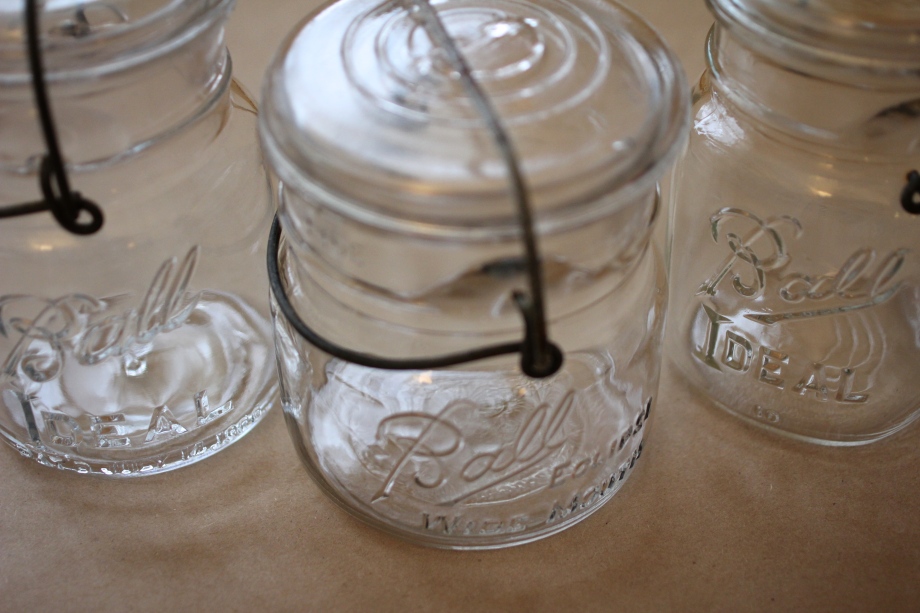
2.) Wash and dry your candle containers.  I used some antique mason jars that I just love.

IMG_4446

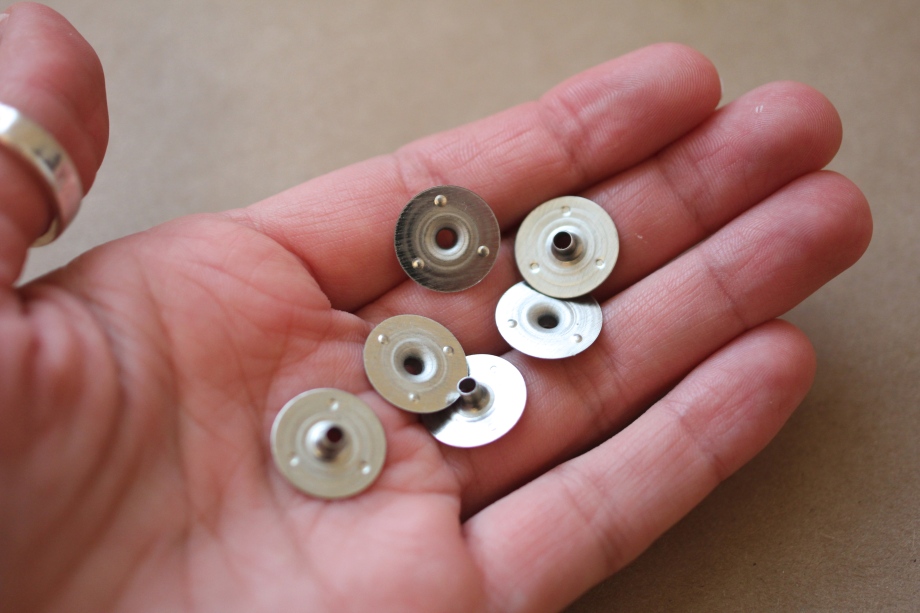
3.) Thread your candle wicks through the wick tabs and fray the bottom end.  Place a tab of hot glue on the bottom of the tab and attach it the bottom of the candle container in the center.  Trim the wick so that it extends above the candle (you can trim it shorter later).  Alternatively, if you don’t want to buy wick tabs, you could just hot glue the wick to the bottom of the container.

IMG_4443

4.) Attach a popsicle stick or straw with a piece of tape to the wick in the middle of the container.  This is to ensure that the wick doesn’t fall down while pouring the wax and also that it stays in the center of the container.

IMG_4458

5.) Melt your wax in a double boiler. (I recommend buying pre-flaked wax, but if you purchase a block, shave it or break it into chunks before melting to ensure a more even melt).  If you don’t have a double boiler, you can make your own by boiling water in a pot and placing a smaller pot or bowl over the pot.  You do not want to melt the wax directly over stove.  Be careful and stir continuously while melting your wax.  You want it to melt, but not boil.  Wax has the potential to combust if it reaches too high a temp.  Once it’s melted remove it from the heat. If you have a candy thermometer, place it in the melting wax and when the wax has reached 170-180 degrees it is done.  Add your essential oils at this point.  Read the directions on the bottle to see how much to add.  If you want to color your candles, now is the time.  Add color chips or crayons until you have achieved your desired color.

**Most important** NEVER leave your wax unattended while melting and be constantly monitoring the temperature- do not allow it to boil.  Once it has melted remove it from the heat immediately.

IMG_4461

6.) Carefully pour your wax into your candle containers over your protected workspace.  Try to avoid the wick.  I recommend transferring the hot wax to a container with a spout like a liquid measuring cup to make pouring easier.  You can fill your candle as much as you like, I got pretty close to the top with mine.

20140207-181226

7.) Let candle dry overnight.

8.) Trim wick to a quarter inch above the candle and light!  Enjoy!

9.) If you spill wax on the outside of your container (which, um, I might have done…) it’s not the end of the world!  Try to wipe of all much as you can while the wax it still hot after pouring without disturbing the candle.  Now this next step depends on what kind of container you’ve used, but worked really well with my mason jars.  I placed my candle in  a pot and filled around the candle with water.  Then I removed the candle and boiled the water.  Once the water was boiling I placed the candle back into the pot.  Let the candle sit in the water for a few minutes and them remove and wipe down.  All the wax comes off in the water!  This might melt your candle a bit so let cool and re-harden after before lighting.


After burning for about two weeks:

IMG_5490

xoxo, Keya

happy anniversary to the little things!

img_7597

We recently celebrated the one year anniversary of the little things diy!  Sitting here, typing this, it actually feels like it was just a week or so ago that we were sitting around the kitchen table discussing how we could possibly, probably….I mean why not, let’s start a blog!

In our first year out from college the little things has done so much to keep us creatively accountable that we couldn’t be more thankful.  The posts we create are things that we want to do and try for ourselves and then we share them with you.  The catch being that after a long day of work, instead of testing homemade hot dog bun recipes, we really feel like cheating and buying them, and the blog forces us to keep creating instead.

We’ve learned a lot this past year, first and foremost being how to use our cameras.  Or rather, starting to learn how to use them, we’ve got a long way to go.  But now instead of pinterest-ing the night away, we find ourselves reading photography how-to’s and discussing things like lighting.  We also aren’t the kind of bloggers who plan ahead and write a bunch of posts for the coming months; we just go as we’re inspired and post along the way.  But we’re trying to think forward more to create content for the future, in a less rushed and more thoughtful manner.  This, in part, will hopefully help with our blogging/real job balance that we’re still trying to figure out.  And we’re learning about you, dear reader.  How to write our posts in a style that is true to ourselves and relatable to you.  What are you interested in?  What about the blog works and doesn’t work?  Really, we’re only one year in and barely have our feet in the water.  But we’re proud to show you what we’ve done so far, and look back on our old posts knowing how we want to change and improve for the future.  We’ve still got lots to learn!  This blogging thing is consuming and exhausting, but in a totally amazing inspiring way.  We hope you’ll stick with us and thanks for reading along so far!

Here are some of our favorite posts:

20130802-182339

fabulous bridal shower piñata / homemade sauerkraut and hot dog buns diy little charm necklaces  / Nashville travel diary / faux milk glass vases  / speakeasy party / diy envelope clutches

Cake Recipe:

Okay, we admit we used a box mix for this cake but sometimes taking a couple shortcuts and doing things the easy way is perfectly acceptable.  We are a little more picky about the frosting however, (the store-bought stuff is way too sweet for our taste), so we made a homemade whipped cream frosting using this recipe from allrecipes.com:

ingredients:

1 box yellow cake mix

8 oz. package of light cream cheese (softened)

1/2 c. sugar

1 tsp. vanilla extract

1/2 tsp. almond extract

2 c. heavy cream

bouquet fresh flowers (you can choose your favorite)

to make:

1. Bake your yellow cake in two 9 inch. round cake pans according to the instructions on the box then set on a cooling rack so your cakes can cool.

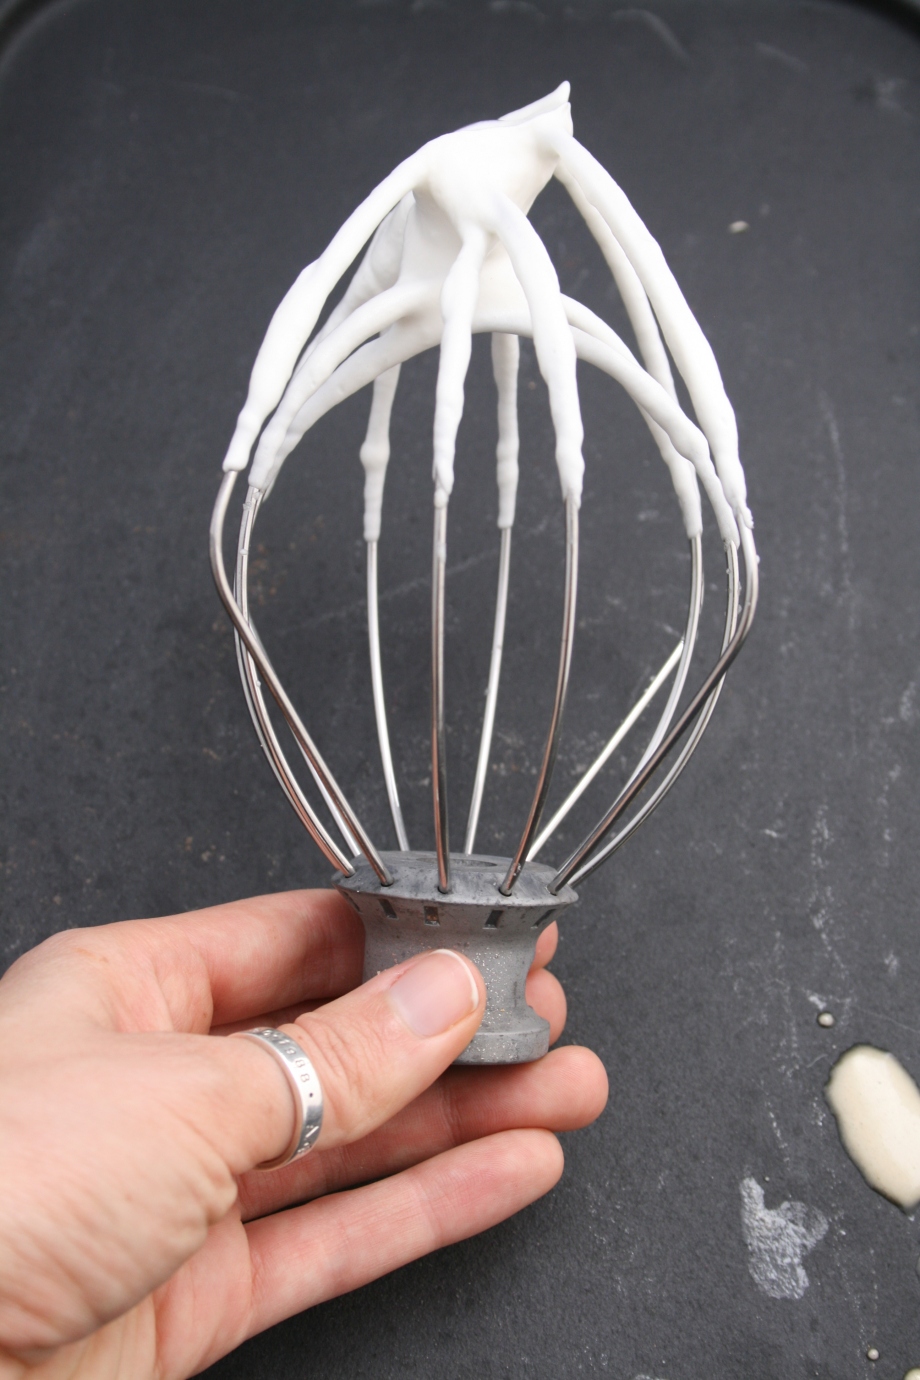
2. For the frosting, combine the cream cheese, sugar, vanilla, and almond extract in a mixing bowl.  Use a whisk or standing mixer on medium speed, mixing until smooth.  Continue mixing while you slowly pour in the heavy cream.  Continue to mix until your frosting can hold a stiff peak.

3. Once your cakes have cooled, use a bread knife to even out the tops of both cakes, creating a smooth flat top.  Frost the top of one cake about 1/4 inch thick and place the other cake on top (so the frosting is in the center of your cake).

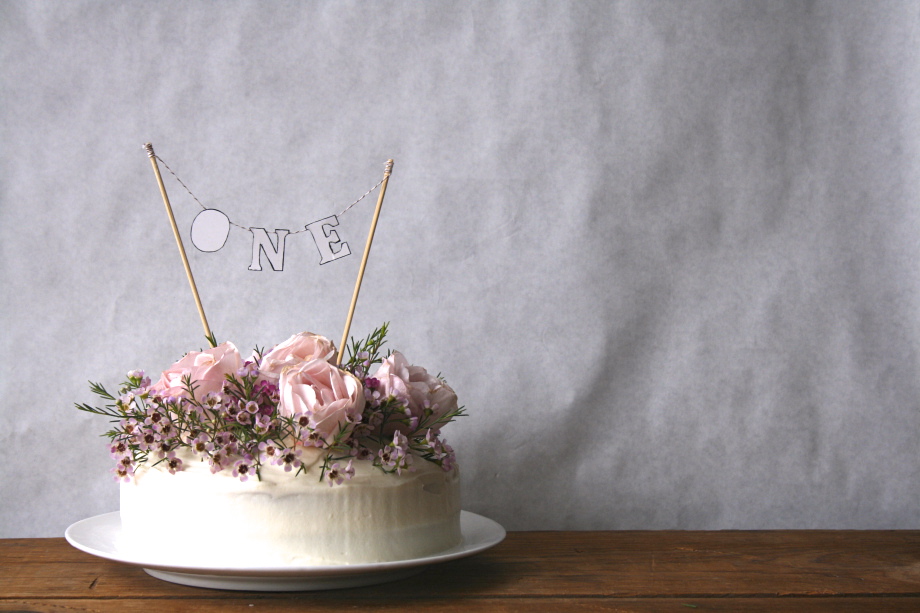
4. Now you can frost your whole cake!  Cut your bouquet of flowers to small stems (about 3 inches long) and begin sticking them into the top of your cake!  We recommend beginning with the larger flowers and using the smaller stems to fill in the extra space.

5.For a cake topper, we cut out the letters from cardstock and used a hot glue gun to glue them onto baker’s twine.  For the sticks, we used the wooden kabob sticks you can buy at the local grocery store.  Glue your baker’s twine onto the sticks and voila!

img_7583

xoxo, Keya and Erica

homemade guinness ice cream and bourbon whipped cream

IMG_7725

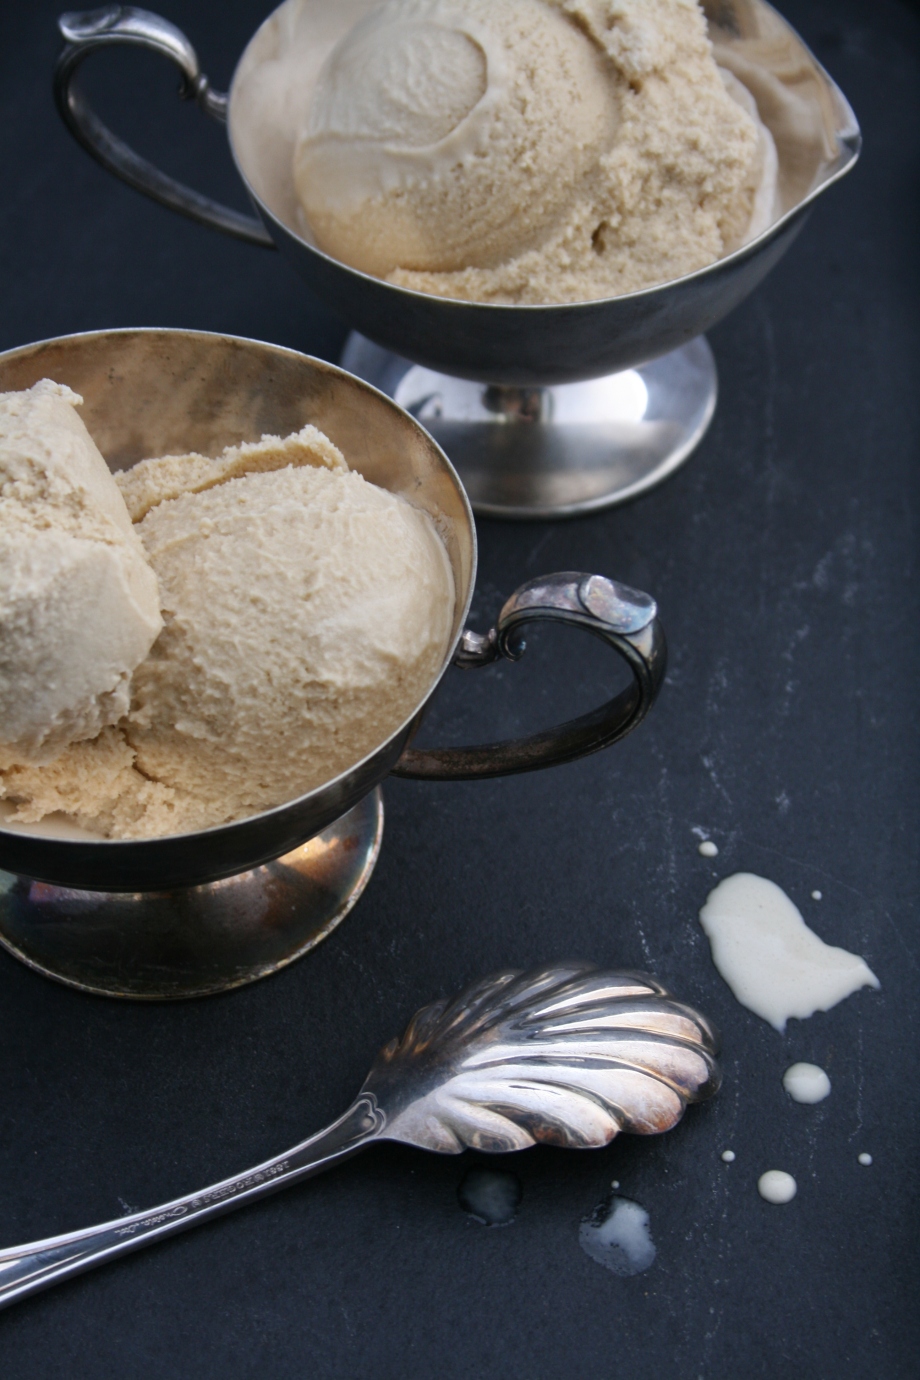
I have to admit I’m not a huge Guinness fan, so when St. Patty’s rolls around each year, I spend my time trying to find a way to avoid the unavoidable, because Guinness and St. Patrick’s Day go together like peanut butter and jelly. But this year, instead of shunning the Guinness tradition I decided to embrace it and incorporate it into a delicious creamy treat.  And the payoff was way worth it!  The ice cream takes a little preparation ahead of time but the end result is a smooth rich taste (almost like coffee ice cream) with a little bit of bite at the end.  And the bourbon whipped cream compliments the ice cream perfectly.  I got this ice cream recipe from thehungrymouse.com by Jessi Cross who has a whole recipe book full of amazing frozen alcoholic goodies, (which is now on the top of my wishlist)!

ingredients (for ice cream): makes about 1 quart

3/4 c. sugar

1/4 tsp. salt

6 egg yolks

2 c. heavy cream

1 bottle of guinness (extra stout recommended)

1 tsp. vanilla

utensils: candy thermometer, ice cream maker (or you can make it by hand)

IMG_7635

to make the ice cream:

(one day ahead)

1.Separate your egg yolks then add to salt and sugar in the bottom of a mid-size pot.  Whisk these together, add the heavy cream and whisk until everything is mixed.  Set your pot on the stove on medium heat and cook, whisking constantly.

2.As your custard begins to thicken, (after about 3 minutes), tip the pot slightly and use a candy thermometer to measure the temperature without letting it touch the bottom or sides of the pot.  When your thermometer has reached 170 degrees remove the pot from heat.

3.Strain the batter into a bowl, this will remove any bits of egg that overcooked.  Add the beer and vanilla and whisk together. Let sit in the refrigerator until it has completely cooled, about 4 hours.

4.Once your ice cream has cooled, process the batter in your ice cream maker for about 30 minutes.  Once it is done, pour into a freezer safe container and cover.  Freeze overnight until solid.

IMG_7673

IMG_7707

ingredients (for whipped cream):

1 c. heavy cream

1 tbs. sugar

1 tbs. bourbon

IMG_7801

to make the whipped cream:

1.Whisk your heavy cream with a mixer on high speed until it begins to thicken.  Gradually add your sugar and bourbon as you continue to whisk on a high speed.  Mix until stiff peaks begin to form and store in a refrigerator until you are ready to serve it.  Enjoy (this stuff is seriously good)!

*I prefer a lighter whipped cream with the rich taste of the ice cream but you can add more sugar/bourbon to taste.

IMG_7774

xoxo, erica

oscar movie ballots

bYPjsyfh

One of the best parts of watching the Oscars is filling out your ballot, tallying up your correct guesses, and then comparing your score with everyone else.  If we can’t be nominated for an Academy Award we need some kind of competition, right?  Last year we made these simple ballots and had everyone fill them out before the show started.

ingredients:

black card-stock (1 sheet per person)

gold sparkle card-stock (1 sheet per 2 people)

printed oscar ballots (1 per person)

oscar stencil

how to:

Print out the official ballot, (you can find it here), and glue it onto black card-stock which you can find in the scrap-booking section of your local craft store. You may have to trim the card-stock down to fit your paper.  Next, cut out Oscar statues from sparkly gold paper and glue these onto the back.  We used a cookie cutter as a stencil but you can also print out your own online.

ballots

What will your votes be this year?

xoxo,

keya and erica